LED strip control from a Raspberry Pi
-
I made this video to demo this.
You can use this strip, or any similar 5V addressable LED strip.
To prepare the Raspberry Pi with the OS, the TRIGGERcmd agent, and connection to your wifi, I recommend the setup.bat script that makes that process a snap.
I used a $10 Raspberry Pi Zero W, but any Pi should work.
Run these commands to install pre-reqs:
sudo su -
apt install python3-pip
pip3 install rpi_ws281x
Contents of green.py:
import sys
from rpi_ws281x import *

if len(sys.argv) > 1:
    if sys.argv[1] == "white":
        color = Color(255,255,255)
        print("white")
    elif sys.argv[1] == "green":
        print("green")
        color = Color(0,255,0)
    elif sys.argv[1] == "red":
        color = Color(255,0,0)
        print("red")
    elif sys.argv[1] == "blue":
        color = Color(0,0,255)
        print("blue")
    elif sys.argv[1] == "off":
        color = Color(0,0,0)
        print("off")
    else:
        color = Color(255,255,255) # white
        print("white")
else:
    color = Color(255,255,255) # white

# LED strip configuration:
LED_COUNT      = 300      # Number of LED pixels.
LED_PIN        = 18      # GPIO pin connected to the pixels (18 uses PWM!).
#LED_PIN        = 10      # GPIO pin connected to the pixels (10 uses SPI /dev/spidev0.0).
LED_FREQ_HZ    = 800000  # LED signal frequency in hertz (usually 800khz)
LED_DMA        = 10      # DMA channel to use for generating signal (try 10)
LED_BRIGHTNESS = 255     # Set to 0 for darkest and 255 for brightest
LED_INVERT     = False   # True to invert the signal (when using NPN transistor level shift)
LED_CHANNEL    = 0       # set to '1' for GPIOs 13, 19, 41, 45 or 53

strip = Adafruit_NeoPixel(LED_COUNT, LED_PIN, LED_FREQ_HZ,LED_DMA,LED_INVERT,LED_BRIGHTNESS,LED_CHANNEL)
strip.begin()

for x in range(0,LED_COUNT):
    strip.setPixelColor(x,color)

strip.show()
0,255,0 is green, 255,0,0 is red, and 0,0,255 is blue.
commands.json entries:
    {"trigger":"Lights","command":"python3 \/root\/leds.py","ground":"background","voice":"lights","allowParams": "true"},
    {"trigger":"White","command":"python3 \/root\/leds.py white","ground":"background","voice":"white","allowParams": "false"},
    {"trigger":"Green","command":"python3 \/root\/leds.py green","ground":"background","voice":"green","allowParams": "false"},
    {"trigger":"Blue","command":"python3 \/root\/leds.py blue","ground":"background","voice":"blue","allowParams": "false"},
    {"trigger":"Red","command":"python3 \/root\/leds.py red","ground":"background","voice":"red","allowParams": "false"},
    {"trigger":"Off","command":"python3 \/root\/leds.py off","ground":"background","voice":"off","allowParams": "false"}
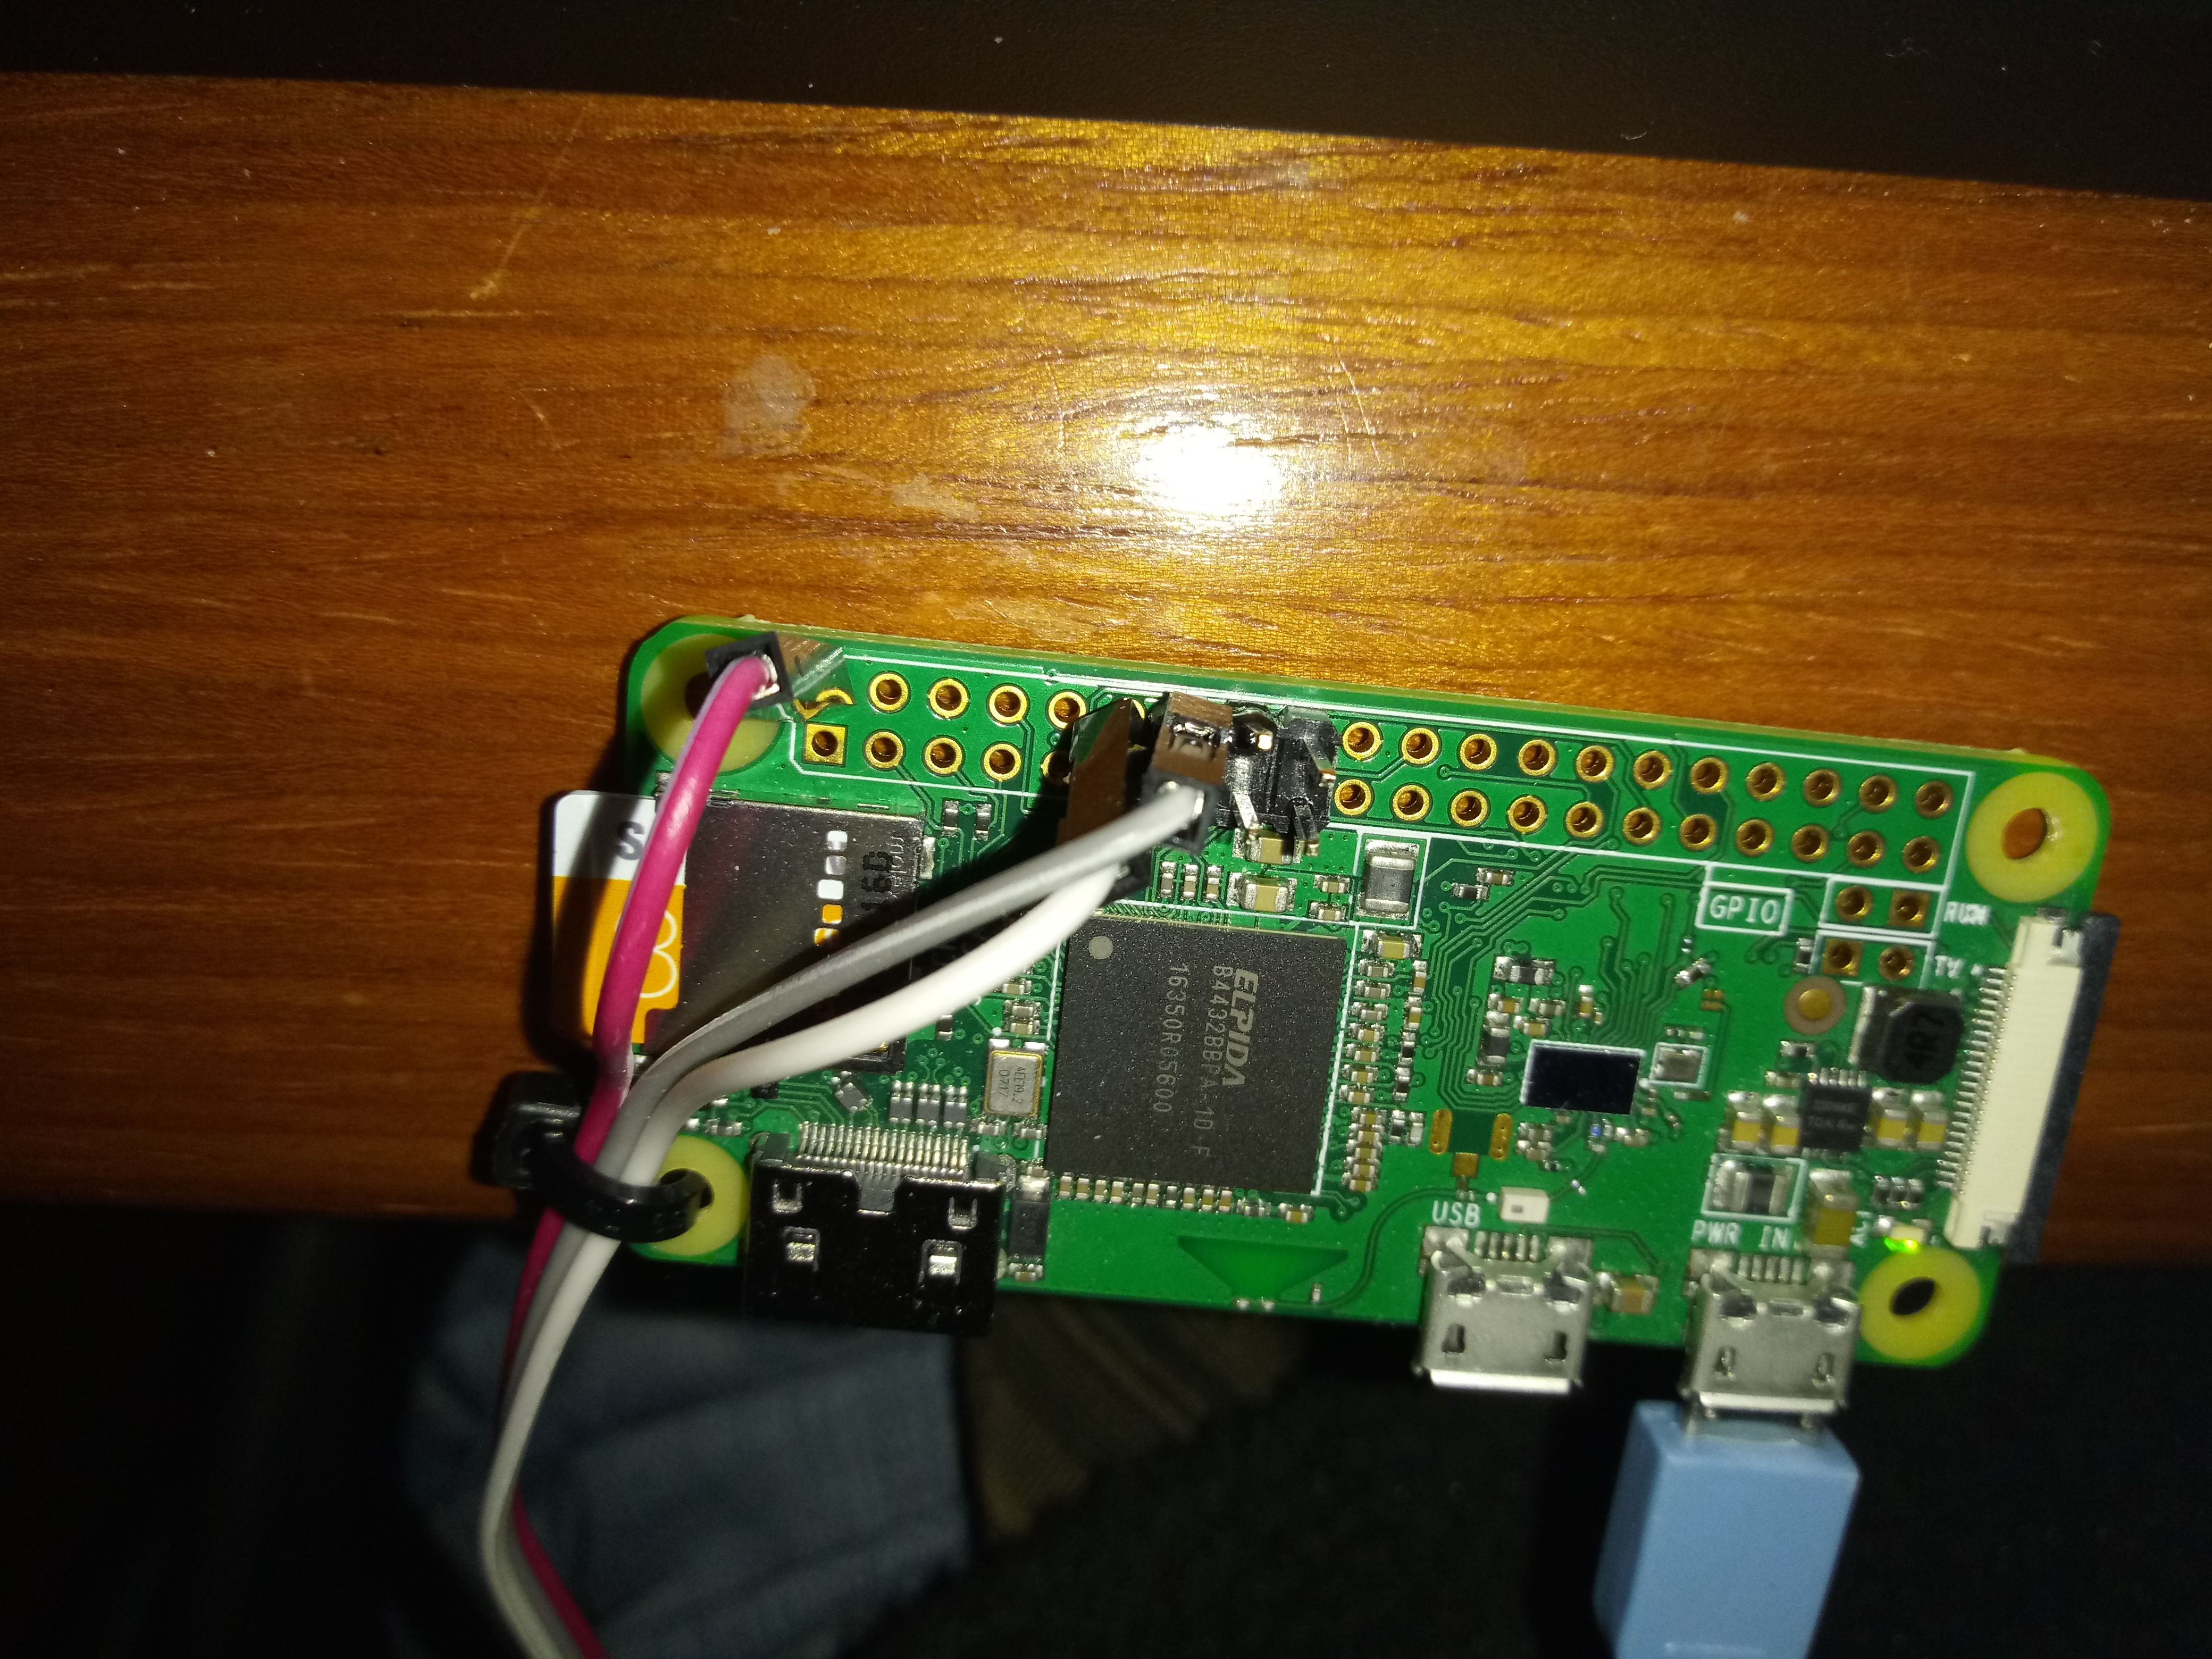
This picture shows how to wire it. Red is 5V, Grey is ground, and White is signal (middle wire on the LED strip).
-
 R Russ referenced this topic on
Hello! It looks like you're interested in this conversation, but you don't have an account yet.
Getting fed up of having to scroll through the same posts each visit? When you register for an account, you'll always come back to exactly where you were before, and choose to be notified of new replies (either via email, or push notification). You'll also be able to save bookmarks and upvote posts to show your appreciation to other community members.
With your input, this post could be even better 💗
Register Login